
Description
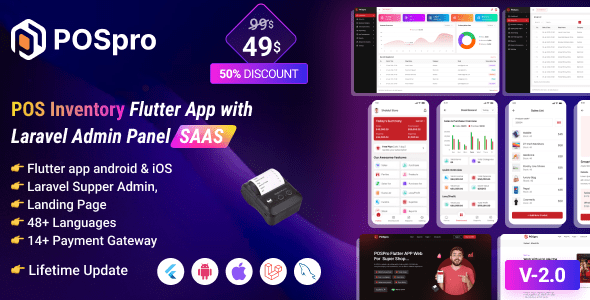
POSpro – POS Inventory Flutter App with Laravel Admin Panel SAAS
POSpro ?C POS Inventory Flutter App with Laravel Admin Panel is a cutting-edge Point of Sale (POS) solution delivered as a Software as a Service (SaaS) application. Developed using the Flutter (App) and Laravel (Admin Panel) frameworks for a seamless cross-platform experience, it integrates effortlessly with existing POS systems to provide a robust and scalable backend.
POSpro works with Bluetooth POS printers and features a subscription system. The app boasts stunning screens covering the Mobile POS Inventory app. Additionally, it includes functionalities for managing products, sales, purchases, parties, loss/profit, stock, ledger, sales lists, purchase lists, due lists, reports, and expenses.
Key Features:
Admin Dashboard:
1. Dashboard:
- Overview of the system??s performance and key metrics.
2. Advertising:
- Manage and track your advertising campaigns.
3. Business List:
- View and manage a comprehensive list of all registered businesses/shops.
4. Business Category:
- Organize businesses into specific categories for better management and searchability.
5. Subscription Plans:
- Create and manage subscription plans for your users. Includes options for different pricing and benefits.
6. Staff Management:
- Add, remove, and manage staff members and their permissions.
7. Reports:
- Generate and view various reports related to business operations and performance.
8. Messages:
- Here, you??ll find all the messages that have been sent to you from the website??s contact page.
9. CMS Manage:
- You can manage your website content from here.
10. Roles & Permissions:
- Define roles and assign permissions to control access to different parts of the system.
11. Settings:
- Configure system settings and preferences to suit your needs.
App
1. Product Catalog:
- Easily add, edit, and organize products with a user-friendly interface.
- Categorize products for efficient inventory management.
2. Sales Processing:
- Smooth and efficient POS transactions, supporting various payment methods.
- Generate and print receipts or send digital receipts via whatsapp, skype, facebook etc.
3. Parties:
- Create detailed profiles for customers like dealer, retailer and wholesaler, including contact information, opening balance, and pricing.
- Maintain supplier details, including contact information, products, and pricing.
4. Sales & Purchase list:
- A dynamic and organized list that displays all completed sales products and transactions.
- List displaying all completed purchase products and transactions.
5. Sales Edit:
- Easily can edit sales.
6. Reports:
- Provides an overview of sales, purchase, due for a specific day.
- Reports can print from apps by bluetooth pos printer and web by printer.
- Also can share whatsapp, skype, facebook etc.
7. Loss/Profit:
- Receive automated, detailed Profit and Loss statements at regular intervals.
- Gain instant access to a visual representation of your business??s financial standing.
8. Stock:
- Easily can monitor the movement of products in and out of the product.
- This information is updated in real-time as sales are made, new stock is added or stock is low.
9. Inventory Management:
- Real-time tracking of stock levels to prevent overstock or stockouts.
- Automated alerts for low inventory and restocking suggestions.
10. User-Role:
- Assign roles and permissions to different users for enhanced security and control.
- Collaborate seamlessly with your team for efficient operation.
11. Subscription Plan:
- Sign up and select the subscription plan that meets your business requirements.
- Easily upgrade your plan as your business evolves.
12. Multi-User Access:
- Assign roles and permissions to different users for enhanced security and control.
- Collaborate seamlessly with your team for efficient operation.
13. User-Friendly Interface:
- Intuitive design for easy navigation and quick learning curve.
- Customizable UI to adapt to different business needs.
Benefits of POS PROpro
- Scalability:
Grow your business effortlessly with a scalable solution that adapts to your needs.
- Reliability:
Rely on a robust and secure Laravel backend for data integrity and reliability.
- Cost-Effective:
SaaS model ensures affordability with no upfront infrastructure costs.
- Real-Time Insights:
Make informed decisions with real-time analytics accessible to super admins.
- Efficiency Boost:
Streamline your business operations, from inventory management to sales processing, for maximum efficiency.
- Centralized Control:
Super Admin capabilities provide centralized control over your entire business network.
POSpro ?C POS Inventory Software App(Flutter)+Super Admin(Laravel) is not just a POS system; it??s a comprehensive solution that empowers super admins and admins alike to streamline operations, enhance efficiency, and drive business growth.
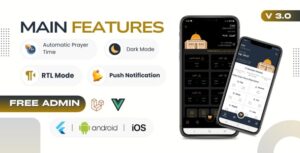
Application Features:
- SaaS Ready Application with Laravel backend
- Easy to modify subscription package
- Clean Code and a well-structured project
- The single code base for both Android & iOS
- Thermal Bluetooth printer integration with automatic and manual printing
- Fully responsive UI
- Best UI & UX
- Great animation
- Easy to customize
- Free lifetime updates & stunning customer support
- Easy to integrate into your project
Flutter and Android Studio Setup Guide
Follow these steps to set up your development environment for Flutter:
Step 1: Install Flutter
Download and install Flutter by following the official instructions:
Flutter Installation Guide
Step 2: Install Android Studio
Download and install Android Studio from the official website:
Download Android Studio
Step 3: Set Up Android Studio
- Open Android Studio.
- Go to File > Settings (on macOS, go to Android Studio > Preferences).
- Navigate to Appearance & Behavior > System Settings > Android SDK.
- Ensure that the Android SDK and necessary tools are installed.
Step 4: Configure Flutter in Android Studio
- Open Android Studio.
- Go to File > Settings (on macOS, go to Android Studio > Preferences).
- Navigate to Plugins and search for ??Flutter??.
- Install the Flutter plugin and restart Android Studio.
- After restarting, open File > New > New Flutter Project to start a new Flutter project.
Step 5: Set Up Your Device
- Enable Developer Mode on your Android device.
- Enable USB Debugging from the Developer Options.
- Connect your device to your computer via USB.
Once you have completed these steps, you are ready to start developing with Flutter and Android Studio.